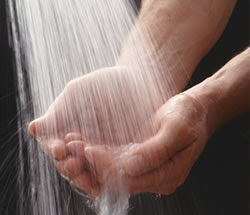
One basic rule is never to photograph a subject’s hands pointing straight into the camera lens. This distorts the size and shape of the hands. Always have the hands at an angle to the lens. Another basic is to photograph the outer edge of the hand whenever possible. This gives a natural, flowing line to the hand and wrist and eliminates distortion that occurs when the hand is photographed from the top or head on.
Try to raise the wrist slightly so there is a gently curving line where the wrist and hand join. Additionally, you should always try to photograph the fingers with a slight separation in between them. This gives them form and definition. When the fingers are closed, there is no definition.
Hands can be a particular problem in group portraits. Despite their small size, they attract attention—especially against dark clothes. They can be especially troublesome in seated groups, where at first glance you might think there are more hands than there should be for the number of people pictured.
A general rule of thumb is to either show all of the hand or show none of it. Don’t allow a thumb or half a hand or only a few fingers to show. Hide as many hands as you can behind flowers, hats, or other people. Be aware of these potentially distracting elements and look for them as part of your visual inspection of the frame before you make the exposure.
0 comments:
Post a Comment