Lighting in Photography Part 9

how to be photographer, how to be good photographer, photographer technique, good photographer, nice photo


Flash Options

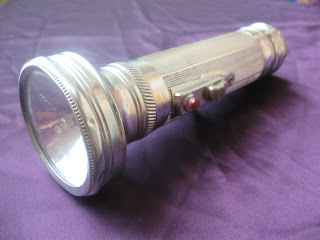
Barebulb. Barebulb flash units are powerful lights that consists of an upright flash tube sealed in a plastic housing for protection. Since there is no reflector, barebulb flash generates light that goes in all directions. It acts more like a large point source light than a small portable flash.

Light falloff with barebulb is less than with other handheld units, making it ideal for flash fill situations; you can use as wide a lens as you own and you won’t get flash falloff with barebulb flash. Barebulb flash produces a sharp, sparkly light, which is too harsh for almost every type of photography except outdoor fill. The trick is not to overpower the daylight. It is most desirable to let the daylight or twilight backlight your subjects, capitalizing on a colorful sky background if one exists, and use barebulb flash to fill the frontal planes of your subjects.

Barebulb flash units are predominantly manual, meaning you must adjust their intensity by adjusting the flash-to-subject distance or the flash output.Many photographers even mount a sequence of barebulb flash units on light stands at the reception for doing candids on the dance floor.

Diffused Flash. As an alternative to barebulb flash, some photographers like to soften their fill flash using a softbox. In this situation, it is best to trigger the strobe with a radio remote. This allows you to place the diffused flash at a 30 to 45 degree angle to the subject(s) for dynamic fill in. For this, it is wise to equal or overpower the daylight exposure slightly so that the off-angle flash acts more like a main light, establishing a lighting pattern. For large group portraits, it may be necessary to use several soft boxes (or to use a single one close to the camera) for more even coverage.


Flawless Fill Flash Exposure

To ensure accurate fill flash exposures every time, meter the daylight with an incident flashmeter in “ambi” mode. Let’s imagine that the metered exposure is 1/30 second at f/8. Next, meter the flash only. It is desirable for the flash output to be one stop less than the ambient exposure; in this case, you would adjust the flash output or flash distance until your flash reading was f/5.6. You would then set the camera to 1/30 second at f/8. That’s it. You could then set the flash output anywhere from f/8 to f/5.6 and not overpower the daylight; the flash would only fill in the shadows created by the daylight and add sparkle to the eyes.

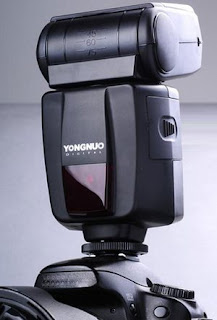
TTL flash systems are ideal for working in mixed-light situations and are virtually foolproof. They can be balanced with existing light and easily programmed to over or underpower the available light by simply dialing in flash exposure compensation in 1/3-stop increments. In TTL flash mode, the flash will react as programmed, cutting or increasing output as you desire in order to optimize the combination of flash and existing light.

Lighting in Photography Part 8

how to be photographer, how to be good photographer, photographer technique, good photographer, nice photo


Reflectors for Fill

Reflectors should be fairly large for maximum versatility. Light discs, made of fabric that is mounted on a flexible and collapsible circular frame, come in a variety of diameters and are a very effective means of providing fill in illumination. They are available from a number of manufacturers and come in silver (for maximum fill output), white, gold foil (for a warming fill light) and black (for blocking light from hitting a portion of the subject). Generally, an assistant is required to position and hold the reflector for maximum effect. Be sure to position reflectors outside the frame and be careful about bouncing light in from beneath your subjects. Lighting coming from under the eye or nose axis is generally unflattering. Try to “focus” your reflectors (this really does require an assistant), so that you are only filling the shadows that need filling in.


Getting the Most from On Camera Flash

On-camera flash should be used sparingly because of the flat, harsh light it produces. As an alternative, many photographers use on-camera flash brackets, which position the flash over and away from the lens, thus minimizing flash red eye and dropping the harsh shadows behind the subjects a slightly more flattering light. On camera flash is often used outdoors, especially with TTL balanced flash exposure systems.With such systems, you can adjust the flash output for various fill in ratios, thus producing consistent exposures. In these situations, the on camera flash is most frequently used to fill in the shadows caused by the daylight, or to match the ambient light output in order to provide direction to the light.

One of the best means of evaluating flash output and the balance between flash illumination and daylight or room light is by using the camera’s LCD screen. While it’s not a perfect tool for evaluating subtle exposure effects, it’s definitely accurate enough to reveal how well your flash is performing. You can see at a glance if you need to increase or decrease flash output.


Know Your Flash Sync Speed

If using a camera with a focal-plane shutter, you have a flash-sync (or X-sync) setting. When working with flash, employing a shutter speed faster than the flash sync speed will result in images that are only half exposed. You can, however, use any shutter speed slower than the flash sync speed. When you do this, your strobe will fire in synchronization with the shutter, but the shutter will remain open after the flash pop, allowing the ambient light to be recorded. The latest generation of DSLRs use flash sync shutter speeds up to 1/500 second, making daylight flash sync at almost any aperture possible. (Note: With in lens blade type shutters, flash sync occurs at any shutter speed, because there is no focal plane shutter curtain to cross the film plane.)

Lighting in Photography Part 7

how to be photographer, how to be good photographer, photographer technique, good photographer, nice photo


Working with Direct Sunlight

When forced to photograph in bright sunlight, begin by turning your subjects so the direct sunlight is backlighting or rim lighting them. This negates the harshness of the light and prevents your subjects from squinting. Then, fill in the backlight with strobe or reflectors (being careful to avoid underexposure). It is best to add 1/3 to 1/2 stop exposure in backlit situations portraits in order to “open up” the skin tones.

Images made in bright sunlight are unusually contrasty. To lessen that contrast, try using telephoto lenses or zooms, which have less inherent contrast than shorter, prime lenses. If shooting digitally, you can adjust your contrast preset to a low setting or shoot in RAW mode, where you can fully control image contrast post capture.

If the sun is low in the sky, you can use cross lighting to get good modeling on your subject. You must be careful, however, to position the subject so that the sun’s side lighting does not hollow out their eye socket on the highlight side. Subtle repositioning will usually correct this. You’ll also need to use fill light on the shadow side to preserve detail. Try to keep your fill flash output about 1/2 to one stop less than your daylight exposure. Watch the Room Light Many hotels use coiled fluorescent bulbs instead of tungsten-filament bulbs in the room lamps. Be on the lookout for them, because these fluorescents will not have the same warming quality as tungsten bulbs and could turn things a bit green. You may have to change your white balance, or use an auto or custom white balance setting, in these situations.

Take Advantage of Window Light

One of the most flattering types of lighting you can use is window lighting. It is soft, minimizes facial imperfections, yet provides a directional source for good facial modeling with low to moderate contrast. Window light is usually a fairly bright light and it is infinitely variable, changing almost by the minute. This allows a great variety of moods, depending on how far you position your subject from the light.

Since daylight falls off rapidly once it enters a window, and is much weaker several feet from the window than it is closer to the window, great care must be taken in determining exposure (particularly when creating group portraits, for which you will usually need to use reflectors to balance the overall light).

The best quality of window light is found mid morning or mid afternoon. Direct sunlight is difficult to work with because of its intensity and the fact that it will often create shadows of the individual windowpanes on the subject. However, you can diffuse overly contrasty window light by taping some acetate diffusion material to the window frame. Light diffused in this manner has the warm feeling of sunlight but without the harsh shadows. (Note: If the light is still too harsh, try doubling the thickness of the acetate for more diffusion.) With the light scattered in this way, you may not even need a fill source unless you are working with a larger group. If that is the case, use reflectors to kick light back into the faces of those farthest
from the window.

Lighting in Photography Part 6

how to be photographer, how to be good photographer, photographer technique, good photographer, nice photo


Evaluate Your Options

Weddings involve almost every kind of light you can imagine open shade, bright sun, dusk, dim room light, and every combination in between. Savvy wedding photographers must feel at home in all these different situations and know how to get great pictures in them.

For example, imagine a courtyard where the main light is diffused daylight coming in through an archway. Here, the ambient fill level would be very low; there may be no auxiliary light sources nearby. Unless your goal was to produce high contrast lighting (not great for brides), you would need to raise the level of the ambient or fill light. You might add light locally (i.e., on the subject via a silver reflector).

This is a quick solution that could be ideal if you are pressed for time or only need to make a couple of shots in the area. Alternately, you might add some fill universally, raising the overall interior light level by using ceiling bounce strobes. This solution involves more setup time and effort, but it could allow you to shoot in a number of locations within the location, not just the one closest to the archway.

Learning to control, predict and alter whatever type of lighting encountered will allow the photographer to create great wedding pictures all day and all night long.


Find and Use Open Shade

Open shade is soft light that is reflected from the sky on overcast days. It is different than shade created by direct sunlight being blocked by obstructions, such as trees or buildings. Open shade can be particularly harsh, especially at midday when the sun is directly overhead. In this situation, open shade takes on the same characteristics as overhead sunlight, creating deep shadows in the eye sockets and under the noses and chins of the subjects.

Open shade can, however, be tamed and made useful by finding an overhang, like tree branches or a porch, which blocks the overhead light but allows soft shade light to filter in from the sides, producing direction and contouring on the subject. This cancels out the overhead nature of the light and produces excellent modeling on the face.

If forced to shoot your subjects out in unobstructed open shade, you must fill in the shade with a frontal flash or reflector. If shooting the bride or the bride and groom, a reflector held close to and beneath your subjects should suffice for filling in the shadows created by open shade. If photographing more than two people, then fill-flash is called for. The intensity of the light should be about equal to the daylight exposure.

Lighting in Photography Part 5

how to be photographer, how to be good photographer, photographer technique, good photographer, nice photo


Avoid Double Shadows and Double Catchlights

Adding a fill light can pose two problems. If placed too close to the subject or is too intense, the fill light will produce its own set of specular highlights that show up in the shadow area of the face, making the skin appear excessively oily. To solve the problem, move the camera and light back slightly or move the fill light laterally away from the camera. In many cases, the fill light also creates a second set of catchlights in the subject’s eyes. This gives the subject a directionless gaze, so these catchlights are usually removed in postproduction. When using a large diffused fill light, there is usually not a problem with dual catchlights. Instead, the fill produces a large, milky highlight that is much less objectionable.

Understand Lighting Ratios

The term “lighting ratio” describes the difference in intensity between the shadow and highlight side of the face. It is expressed numerically: 2:1, 3:1, etc. In the studio, one can control the ratio precisely; in the field, your goal should be more general. Is there detail in both important highlight and shadow areas? Are the shadow areas too dark and lifeless? With digital, one can inspect the lighting by firing a few test frames. (This is particularly important when using flash, since you cannot see lighting effect with the naked eye.) Professionals should also carry an incident
flash meter, which also measures ambient light. From the subject position, you can then measure the highlight side of the face separately from the shadow side of the face, thus determining the difference between the two and thus the effective lighting ratio.

In a 2:1 lighting ratio, the main and fill light sources are the same intensity. A 3:1 lighting ratio is produced when the main light is one stop greater in intensity than the fill light. In a 4:1 ratio, the main light is 11/2 stops greater in intensity than the fill light. In a 5:1 ratio, the main light is two stops greater than the fill light.

Avoid Overlighting

In setting the lights, it is important that you position them gradually, studying the effect as you aim each additional source at the subject. If you merely point the light directly at the subject, you will probably overlight the person, producing pasty highlights with no detail. Instead, feather the light so that you employ the edge of the light to illuminate the subject. This will add brilliance to your highlights, enhancing the illusion of depth. (Note: Sometimes feathering won’t produce the desired highlight brilliance. If this happens, making a lateral adjustment to the light or moving it back from its current position will usually rectify the situation.)

Lighting in Photography Part 4

how to be photographer, how to be good photographer, photographer technique, good photographer, nice photo


Rembrandt Lighting. Rembrandt lighting, also called 45 degree lighting, is characterized by a small, triangular highlight on the shadowed cheek of the subject. This is created by moving the main light lower and farther to the side than in loop and Paramount lighting; the main light comes almost from the subject’s side, depending on how far his or her head is turned away from the camera. The fill light is used in the same manner as it is for loop lighting, although a weaker setting is often used to accentuate the shadow-side highlight. The hair light is often used a little closer to the subject for more brilliant highlights in the hair. The background light is in the standard position. With this setup, kickers are often used to delineate the sides of the face. (Note: To ensure they are not shining directly into the lens, place your hand between the subject and the camera on the axis of the kicker. If your hand casts a shadow on the lens, then the kicker is shining directly into the lens and should be adjusted.)

Split Lighting. Split lighting occurs when the main light illuminates only half the face. This is produced by placing the main light low and to the side of the subject. Depending on how far the subject is turned from the camera, the main light may even be slightly behind the subject. This placement of the main light creates a nice slimming effect. It can also be used with a weak fill to hide facial irregularities. For a dramatic effect, use split lighting with no fill light. The fill light, hair light, and background light are used normally for split lighting.

Profile or Rim Lighting. Profile or rim lighting is used when the subject’s head is turned 90 degrees away from the camera lens. It is a dramatic style of lighting used to accent elegant features. It is used less frequently now than in the past, but it remains a stylish type of portrait lighting. To light the profile, the main light is placed behind the subject so that it illuminates the far side of the face and leaves a polished highlight along its outline. Care should be taken so that the light principally accents the face, rather than the hair or neck. In this setup, the fill light is moved to the same side of the camera as the main light and a reflector is used to fill in the shadows. An optional hair light can be used on the opposite side of the main light for better tonal separation of the hair from the background. The background light is used normally.

You can even create an elegant profile of the bride with a single flash used as a backlight, outlining the edges of her face, neck, and the wedding veil. With the daylight as fill, only one light is required to produce an elegant, classically lit portrait.

Lighting in Photography Part 3

how to be photographer, how to be good photographer, photographer technique, good photographer, nice photo


Look for the Classic Lighting Patterns

While the classic lighting patterns do not have to be used with absolute precision, it is essential to know what they are and how to achieve them. If, for instance, you are photographing your bride and groom outdoors, you can position a single main light to produce the desired lighting pattern and ratio, and use the ambient light (shade, or sun as back lighting) as the fill light. No other lights are needed to produce any of the five basic portrait set-up. Use of reflectors, instead of an independent fill light or kickers, may accomplish much the same results in terms of controlling light. Basically, however, each of the lighting patterns takes its personality from the placement
of the main light, so this is the most important source to consider.

Paramount Lighting. In Paramount lighting, sometimes called butterfly lighting or glamour lighting, the main light is placed high and directly in front of the face. This gives a symmetrical, butterfly shaped shadow directly beneath the subject’s nose, it also tends to emphasize cheekbones and good skin. The fill light is placed at the subject’s head height directly under the main light. Since both the main and fill lights are on the same side of the camera, a reflector is used on the opposite of the subject to fill in the deep shadows on the neck and shaded cheek. The hair light is used opposite the main light and placed so that it does not skim onto the face of the subject. The background light (if used) should be low and behind the subject, forming a semi circle of illumination background.

Loop Lighting. Loop lighting is a minor variation of Paramount lighting and is ideal for people with average, oval shaped faces. The main light is lowered and moved more to the side of the subject so that the shadow under the nose becomes a small loop on the shadow side of the face. The fill light is placed on the opposite side of the camera from the main light, close to the camera lens. (Note: Be sure to evaluate this from the camera position, making sure the fill light does not cast a shadow of its own.) In loop lighting, the hair light and background lights are used the same way they are in Paramount lighting.

Lighting in Photography Part 2

<
how to be photographer, how to be good photographer, photographer technique, good photographer, nice photo


Lighting Tips from Mauricio Donelli

According to Mauricio Donelli, “The most important thing when creating a spectacular and beautiful image of a bride is to be very, very fast. Own the situation and give the bride the confidence to be her most beautiful in front of your lens. The essence of this philosophy is to take the pictures quickly if you lose control and spend too much time evaluating the moment, you will freeze everything and lose the perfect image.” To do this, Donelli uses the D2X and the Leaf back 28 for the Mamiya.

“I don’t work with too much artificial light,” he also notes. “Also, if most of the situations are being taken at night, the fact is that I work a lot with very slow shutter speeds. This gives a good mix between the flash and the ambient light presence. Also, you can work with the single bulbs that you find in ceilings and walls and place them behind the subject to give an effect of warmth and depth. Sometimes we don’t need to use a lot of light. Much of the time, my pictures are taken with natural light and filled with mobile flash from the camera. I prefer the Metz 60-CT4 series. They are the best I’ve used for this type of fill.”

“It is important to have a good, lightweight tripod with you, as well as one or two assistants working around the subject with flashes. Of course, you will need to trigger them from the camera with radio-controlled slaves. They work effectively and are very handy to use with the flash on a monopod. Also, it is important to have a decent-size reflectors (LiteDiscs) to reflect light back onto your subject’s shadow areas.”

As for power, Donelli says that he never uses generators, because his weddings almost always take place in hotels or homes. “When they do the weddings in open areas and put up tents,” he notes, “they need to have light too, so I always ask the wedding coordinators to provide two or three plugs for my monolight-mounted round softbox inside the tent. I never use more than one, but I travel with two in case one goes bad.”

Lighting in Photography Part 1

how to be photographer, how to be good photographer, photographer technique, good photographer, nice photo


Control the Hair Light

The hair light is an optional light that can be used to accent the subject’s hair and create highlights that help separate it from the background. Adding barn doors to this light (black, metallic, adjustable flaps that can be opened or closed to control the width of the beam of the light) will help keep the light just where you want it and prevent stray light from hitting the camera lens, reducing the potential for lens flare. Hair lights are frequently undiffused sources, so they are normally adjusted to a reduced power setting. In some cases, however, strip lights (small softboxes) are used as hair lights because of their easy mobility and broad diffused highlights.

Use a Background Light

The background light is a low-output light. It is used to illuminate the background so that the subject and background will separate tonally. The background light is usually used on a stand placed directly behind the subject, out of view of the camera lens. It can also be placed on a higher stand or boom and directed onto the background from either side of the set.

Add Kicker Lights

Kickers are optional lights that are used in much the same way as hair lights. These add highlights to the sides of the face or body to increase the feeling of depth and richness in a portrait. Because they are used behind the subject, they produce highlights with great brilliance, as the light just glances off the skin or clothing. Since kickers are set behind the subject, barn doors should be used to control the light.

Choose Broad or Short Lighting

There are two basic types of portrait lighting. Broad lighting means that the main light is illuminating the side of the face turned toward the camera (the more visible side of the face). This is used less frequently than short lighting because it flattens and de-emphasizes facial contours. It is often used, however, to widen a very thin or long face.

Short lighting means that the main light is illuminating the side of the face turned away from the camera (the less visible side of the face). Short lighting emphasizes facial contours and can be used as a corrective lighting technique to narrow a round or wide face.When used with a weak fill light, short lighting produces a dramatic look with bold highlights and pronounced shadows.

Refine the Main and Fill Lights

how to be photographer, how to be good photographer, photographer technique, good photographer, nice photo


Because of the hurried nature of the wedding day, it is sometimes impossible to give the lighting the same degree of complexity you would for a studio shoot. However, with an assistant, and a little bit of time you can pull off some beautifully lit formal portraits the day of the wedding. The key to doing this, is understanding the concepts of studio lighting. The two lighting sources that will have the biggest impact are the main and fill lights.

The main light is the light source that creates the visible pattern of light and shadow on the subject’s face. For this, most photographers opt to use a diffused source. This could be window light diffused through sheer curtains, soft sky light at the edge of a shady area, or strobe light diffused by an umbrella or soft box.

The fill light is used to lighten the shadows created by the main light. To do this, the fill light should be at least a little weaker than the main light (so it does not create a second set of shadows). Fill light may be created using a reflector or by adding a small diffused light close to the camera.

Control the Focus Field

how to be photographer, how to be good photographer, photographer technique, good photographer, nice photo


Adjust the Camera Angle. With large groups, raising the camera height and angling the camera downward keeps the film plane more parallel to the plane of the group’s faces. Doing this does not change the depth of field, but it optimizes the plane of focus to accommodate the depth of the group. This makes it possible to get both the front and back rows in focus.

Marc Weisberg is a perfectionist, but when you see images like this, you know why. “It was late in the day and we were losing sun,” he recalls. “The shadows are actually from my trusty Quantum flash, mounted with a quick release plate on a Bogen tripod at camera left. Instead of using a light meter, which I use now for my large group portraits, I used my more expensive light meter. My Canon 1-D set to manual. I dialed in the exposure while looking [at the meter scale] through the viewfinder. I shot a Canon “Polaroid” to make sure that my histogram was not clipping the shadows or highlights. Then I set my Quantum flash one stop under and metered the flash output with my Sekonic L508 light meter. Pocket Wizards were used to trigger my Quantum flash.”

After the shoot, Weisberg added a few enhancements. “The saturation was selectively bumped up with the saturation tool in Photoshop,” he says. ”The LucisArt filter was also used. Since this filter wreaks havoc on the skin, a mask was created so that I could selectively apply the effects to the dress, bringing out the delicate folds, and to the shoes and tuxedos, to bring out the highlights better. I also used the LucisArt filter with a mask to bring out texture details in the walls, terra cotta tiles, and plants.”

Adjust the Subject Distance. If your subjects are in a straight line, those at the ends of the group will be proportionately farther away from the lens than those in the middle of the lineup (unless you are working at a great distance from the subjects). As a result, those farthest from the lens will be difficult to keep in focus. The solution is to bend the group, having the middle of the group step back and the ends of the group step forward so that all of the people are at the same relative distance to the camera. To the camera, the group will still look like a straight line, but by distorting the plane of sharpness you will be able to accommodate the entire group.

Group Portraits

how to be photographer, how to be good photographer, photographer technique, good photographer, nice photo


Photographing Larger Groups

As people gather for large group portraits, have them put their drinks down before they enter the staging area, then arrange the group so that the bride and groom are the center of interest and everyone else’s face can be seen (tell everyone that they need to be able to see you with both eyes to be seen in the photo). Look for a high vantage point, such as a balcony or second story window, from which you can make the portrait. You can also use your trusty stepladder, but be sure someone holds it steady particularly if you’re at the very top. Use a wide angle lens and focus about a third of the way into the group, using a moderate taking aperture to keep everyone
sharply focused. Another trick is to have the last row in a group lean in while having the first row lean back, thus creating a shallower subject plane, making it easier to hold the focus across the entire group.

Speeding Up Your Group Portraits

The best man and ushers can usually be persuaded to help organize large group photos. Be sure to have everyone make it sound like fun it should be. One solution is to make your formal groups at the church door as the couple and bridal party emerge. Everyone in the wedding party is present and the parents are nearby. If you don’t have a lot of time to make these groups, this is a great way to get them all at once in under five minutes.

Adding People in Photography

how to be photographer, how to be good photographer, photographer technique, good photographer, nice photo

Adding a Third Person

A group portrait of three is still small and intimate. It lends itself well to a pyramid or diamond shaped composition, or an inverted triangle, all of which are pleasing to the eye. Don’t simply adjust the height of the faces so that each is at a different level; turn the shoulders of those at either end of the group in toward the central person as a means of looping the group together. You can also try creating a diagonal line with the faces at different heights and all the people in the group touching. Or, create a bird’s eye view cluster the group together, grab a stepladder or other high vantage point, and you have got a lovely arrangement. It’s what photographer Norman Phillips calls “a bouquet.” For a simple variation, have the people turn their backs to each other, so they are all facing out of the triangle.

how to be photographer, how to be good photographer, photographer technique, good photographer, nice photo

Adding a Fourth and Fifth Person

As you photograph more group portraits, you will find that even numbers of people are harder to pose than odd. Three, five, seven, or nine people seem much easier to photograph than similarly sized groups of an even number. The reason is that the eye and brain tend to accept the disorder of odd numbered objects more readily than even numbered objects. (Note: As you add more people to a group, remember to do everything you can to keep the film plane parallel to the plane of the group’s faces in order to ensure that everyone is sharply focused.)

With four people, you can simply add a person to the existing poses of three described above with the following advice in mind. First, be sure to keep the eye height of the fourth person different from any of the others in the group. Second, be aware that the faces will now begin forming shapes within your composition. Think in terms of pyramids, extended triangles, diamonds, and curved lines. Finally, be aware of lines, shapes, and direction as you build your groups.

An excellent pose for four people is a sweeping curve of three people with the fourth person added below and between the first and second person in the group. Alternately, the fourth person can be positioned slightly outside the group for accent, without necessarily disrupting the harmony of the rest of the group.

Posing Couples

how to be photographer, how to be good photographer, photographer technique, good photographer, nice photo


The simplest of groups is one with just two people. Whether it’s a bride and groom, mom and dad, or the best man and maid of honor, the basic building blocks call for one person slightly higher than the other. A good starting point is to position the mouth of the lower person even with the forehead of the higher person.

Although they can be posed in parallel position (both subjects facing the same direction), a more interesting dynamic can be achieved by having them pose at 45 degree angles to each other, so their shoulders face in toward one another. With this pose you can create a number of variations by moving them closer or farther apart.

Another intimate pose is to have two profiles facing each other. One should still be higher than the other, as this allows you to create an implied diagonal line between their eyes, which also gives the portrait direction. Since this type of image is fairly close up, make sure that the frontal planes of the subjects’ faces are roughly parallel so that you can hold the focus on both.

The formal portraits of the bride and groom together are significant images that demand special time and an understanding of formal posing and lighting techniques. Often the photographer will arrange to make the formal portraits on the day of the wedding, but several hours before the day’s schedule commences. Couples relish the alone time and it is a good opportunity for the photographer to break the ice with the couple.

Control the Camera Height part 2

how to be photographer, how to be good photographer, photographer technique, good photographer, nice photo


By raising the camera height in a three quarter or full length portrait, you enlarge the head and shoulders region of the subject, but slim the hips and legs. Conversely, lowering the camera reduces the size of the head, but enlarges the legs and thighs.

Tilting the camera down when raising the camera (and up when lowering it) increases these effects. Also, the closer the camera is to the subject, the more pronounced the changes are. If you find that, after you adjust camera height for a desired effect, there is no change, move the camera in closer to the subject and observe the effect again.

When you raise or lower the camera in a head-and-shoulders portrait, the effects are even more dramatic. Raising the camera height lengthens the nose, narrows the chin and jaw line, and broadens the forehead. Lowering camera height shortens the nose, de emphasizes the forehead, and widens the jaw line, while accentuating the chin.

While there is little time for many such corrections on the wedding day, knowing these rules and introducing them into the way you photograph people will help make the techniques second nature.

Control the Camera Height part 1

how to be photographer, how to be good photographer, photographer technique, good photographer, nice photo


When photographing people with average features, there are a few general rules that govern camera height in relation to the subject. These rules will produce normal (not exaggerated) perspective.

For head and shoulders portraits, the rule of thumb is that camera height should be the same height as the tip of the subject’s nose. For three quarter length portraits, the camera should be at a height midway between the subject’s waist and neck. In full length portraits, the camera should be the same height as the subject’s waist.

In each case, the camera is at a height that divides the subject into two equal halves in the viewfinder. This is so that the features above and below the lens subject axis will be the same distance from the lens, and thus recede equally for “normal” perspective.

When the camera is raised or lowered, the perspective (the size relationship between parts of the photo) changes. This is particularly exaggerated with wide angle lenses. By controlling perspective, you can alter the subject’s physical traits.

Evaluate the Arms and Hands part 2

how to be photographer, how to be good photographer, photographer technique, good photographer, nice photo


One basic rule is never to photograph a subject’s hands pointing straight into the camera lens. This distorts the size and shape of the hands. Always have the hands at an angle to the lens. Another basic is to photograph the outer edge of the hand whenever possible. This gives a natural, flowing line to the hand and wrist and eliminates distortion that occurs when the hand is photographed from the top or head on.

Try to raise the wrist slightly so there is a gently curving line where the wrist and hand join. Additionally, you should always try to photograph the fingers with a slight separation in between them. This gives them form and definition. When the fingers are closed, there is no definition.

Hands can be a particular problem in group portraits. Despite their small size, they attract attention—especially against dark clothes. They can be especially troublesome in seated groups, where at first glance you might think there are more hands than there should be for the number of people pictured.

A general rule of thumb is to either show all of the hand or show none of it. Don’t allow a thumb or half a hand or only a few fingers to show. Hide as many hands as you can behind flowers, hats, or other people. Be aware of these potentially distracting elements and look for them as part of your visual inspection of the frame before you make the exposure.

Evaluate the Arms and Hands part 1

how to be photographer, how to be good photographer, photographer technique, good photographer, nice photo


Arms. Subjects’ arms should generally not be allowed to fall to their sides, but should project outward to provide gently sloping lines and a “base” to the composition. This is achieved in a number of ways. For men, ask them to put their hands in their pockets; for women, ask them to bring their hands to their waist (whether they are seated or standing).

Remind them that there should be a slight space between their upper arms and their torsos. This triangular base in the composition visually attracts the viewer’s eye upward, toward the face, and also prevents subjects from appearing to have flat and flabby arms.

Hands. Posing hands properly can be very difficult because, in most portraits, they are closer to the camera than the subject’s head and thus appear larger. One thing that will give hands a more natural perspective is to use a longer than normal lens. Although holding the focus on both the hands and face is more difficult with a longer lens, the size relationship between them will appear more natural. If the hands are slightly out of focus, this is not as crucial as when the eyes or face are soft.

Watch the Eyes and Smile part 2

how to be photographer, how to be good photographer, photographer technique, good photographer, nice photo


Remind the subject to moisten her lips periodically. This makes the lips sparkle in the finished portrait, as the moisture produces tiny specular highlights on the lips. Also, pay close attention to your subject’s mouth, making sure there is no tension in the muscles around it, since this will give the portrait an unnatural, posed look. Again, an air of relaxation best relieves tension, so talk to the person to take his or her mind off the photo.

One of the best photographers I’ve ever seen at “enlivening” total strangers is Ken Sklute. I’ve looked at literally hundreds of his wedding images and in almost every photograph, the people are happy and relaxed in a natural, typical way. Nothing ever looks posed in his photography it’s almost as if he happened by this beautiful picture and snapped the shutter. One of the ways he gets people “under his spell” is with his enthusiasm for the excitement of the day, it’s contagious and his affability translates into attentive subjects.

While it helps any wedding photographer to be able to relate well to people, those with special gifts good story tellers or a great sense of humor should use those skills to get the most from their clients.

Watch the Eyes and Smile part 1

how to be photographer, how to be good photographer, photographer technique, good photographer, nice photo


The Eyes. The best way to keep your subject’s eyes active and alive is to engage them in conversation. Look at the person while you are setting up and try to find a common frame of interest. Inquire about the other person almost everyone loves to talk about themselves! If the person does not look at you when you are talking, he or she is either uncomfortable or shy. In either case, you have to work to relax the person.

Try a variety of conversational topics until you find one he or she warms to and then pursue it. As you gain their interest, you will take the subject’s mind off of the photograph. One of the best ways to enliven your subject’s eyes is to tell an amusing story. If they enjoy it, their eyes will smile one of the most endearing expressions a human being can make.

Start the formal session by having the person look at you. Using a cable release with the camera tripod mounted forces you to become the host and allows you to physically hold the subject’s gaze. It is a good idea to shoot a few frames of the person looking directly into the camera, but most people will appreciate some variety.

The Smile. One of the easiest ways to produce a natural smile is to praise your subject. Tell her how good she looks and how much you like a certain feature of her eyes, her hair style, etc. To simply say “Smile!” will produce that familiar lifeless expression. By sincere confidence building and flattery, you will get the person to smile naturally and sincerely and their eyes will be engaged by what you are saying.

Refine The Head and Shoulders Axis

how to be photographer, how to be good photographer, photographer technique, good photographer, nice photo, axis


One of the basics of flattering portraiture is that the subject’s shoulders should be turned at an angle to the camera. With the shoulders facing the camera straight on to the lens, the person looks wider than he or she really is. Additionally, the head should be turned in a different direction than the shoulders. This provides an opposing or complementary line within the photograph that, when seen together with the line of the body, creates a sense of tension and balance. With men, the head is often turned the same general direction as the shoulders (but not at exactly the same angle); with women, the head is usually at an angle that opposes the line of the body.

Consider the Facial Views

As mentioned previously, the head should be at a different angle than the shoulders. There are three basic head positions (relative to the camera) found in portraiture: the seven-eighths view, the three-quarter view, and the profile view. Knowing these positions will help you provide variety in your images. In group portraits, you may even end up using all three head positions in a single pose (the more people in the group, the more likely that becomes).

The Seven Eighths View. If you consider the full face as a head on “mug shot,” then the seven eighths view is when the subject’s face is turned just slightly away from the camera. In other words, you will see slightly more of one side of the subject’s face. You will still see the subject’s far ear in a seven-eighths view.

The Three Quarter View. This view is achieved when the face is turned sufficiently that the far ear is hidden from the camera. With this pose, the far eye will appear smaller because it is farther away from the camera than the near eye. Because of this, it is important to position the subject so that their smaller eye (people usually have one eye that is slightly smaller than the other) is closest to the camera. This way, the perspective makes both eyes appear to be the same size in the photograph. This may not be something you have time to do when posing groups of people at a wedding, but when photographing the bride and groom, care should be taken to notice these subtleties.

Profile. In the profile, the head is turned almost 90 degrees to the camera. Only one eye is visible. In posing your subjects in profile, have them turn their heads gradually away from the camera position until the far eye and eyelashes just disappear.

Choose a Portrait Length

how to be photographer, how to be good photographer, photographer technique, good photographer, nice photo


Head and Shoulders. In a head-and-shoulders portrait, all of your camera technique will be evident, so focus is critical (start with the eyes) and the lighting must be flawless. Use changes in camera height to correct any irregularities. Often, head-and-shoulders portraits are of the face alone as in a beauty shot. In such an image, it is important to have a dynamic element, like a diagonal line, to create visual interest. This can be the line of the eyes, the tilt of the head, or the line of the shoulders.

Three-Quarter and Full Length Poses. When you employ a three quarter length pose (showing the subject from the head to below the waist) or a full length pose (showing the subject from head to toe), you have more of the body to contend with.

In these types of portraits, it is important to turn the body so that it is at an angle to the lens. Don’t photograph the person head on, as this adds mass to the body. Also, your subject’s weight should be on their back foot (the foot farthest from the camera) rather than distributed evenly on both feet or, worse yet, on the front foot. There should be a slight bend in the front knee if the person is standing. This helps break up the static line of a straight leg. The feet should also be at an angle to the camera; feet look stumpy when shot straight on.

When the subject is sitting, a cross legged pose is effective. Have the top leg facing at an angle and not directly into the lens. When posing a woman who is seated, have her tuck the calf of the leg closest to the camera in behind the leg farthest from the camera. This reduces the size of the calves, since the leg that is farther from the camera becomes more prominent. Whenever possible, have a slight space between the subject’s leg and the chair, as this will slim down the thighs and calves.

In three quarter images, you should never frame the portrait so that a joint an elbow, knee, or ankle, for example is cut off at the edge of the frame. This sometimes happens when a portrait is cropped. Instead, crop between joints, at mid thigh or mid-calf, for example, when you break the composition at a joint, it produces a disquieting feeling.

Understand Posing Essentials

how to be photographer, how to be good photographer, photographer technique, good photographer, nice photo


No matter what style of photography is being used, there are certain posing essentials that need to be at work—otherwise your technique (or lack of it) will be obvious. The more you know about the rules of posing, and particularly the subtleties, the more you can apply to your wedding images. And the more you practice these principles, the more they will become second nature and a part of your overall technique.

Giving Directions. There are a number of ways to give posing instructions. You can tell your subjects what you want them to do, you can gently move them into position, or you can demonstrate the pose. The latter is perhaps the most effective, as it breaks down barriers of self-consciousness on both sides of the camera.

Subject Comfort. A subject who feels uncomfortable will most likely look uncomfortable in the photos. After all, these are normal people, not models who make their living posing. Use a pose that feels good to the subject, then use your expertise to refine it—add a turn of a wrist, place the weight on the back foot, turn the body away from the camera—to create the most flattering look possible.

Chimping Evaluating an Image

how to be photographer, how to be good photographer, photographer technique, good photographer, nice photo


The term “chimping” is attributed to USA Today sports photographer Robert Deutsch, who used it to describe the scene of multiple digital photographers, covering the 1999 US Open, simultaneously checking their LCDs after each backhand (as he writes, “all looking at their screens like monkeys”).

While the concept of “chimping” certainly has a derogatory feel to it, the practice of checking your LCD can be very useful. With higher resolution LCDs, larger screens, and more functions in the playback mode of the camera, there’s no reason you can’t use the LCD most of the time for evaluating images. For example, most professional DSLRs let you zoom and scroll across an image at high magnification to evaluate details. This will tell you if the image is sharp or not.

Also, you can set certain playback presets to automatically indicate problems like clipped highlights (bright regions of the image in which no detail is present). With this feature, the clipped highlights blink on the LCD preview, so you can tell what areas were not properly exposed and how to remedy the situation. On Nikon’s playback menu, you can switch from histogram back to highlight-clipping mode in an instant. As you begin to use these features, they become second nature to your shooting workflow.

Watch the File Compression

how to be photographer, how to be good photographer, photographer technique, good photographer, nice photo


Many file formats use compression to reduce file size. Lossless formats compress the file without removing image detail or color information. Lossy formats remove detail. Here are some common compression schemes:

LZW. LZW is a lossless compression strategy supported by TIFF, PDF, GIF, and PostScript language file formats. It provides the greatest reduction in file size when used for images that contain large areas of a single color.

JPEG. JPEG is a lossy compression strategy supported by JPEG, TIFF, PDF, and PostScript language file formats. When saving an image in the JPEG format in Photoshop, you can specify the level of compression by choosing an option from the Quality menu (in the JPEG Options dialog box). For the best results, always choose the highest image quality (a setting of 10 to 12).

ZIP. ZIP is a lossless compression strategy that is supported by PDF and TIFF file formats. Like LZW, the ZIP compression strategy provides the greatest reduction in file size when used for images containing large areas of a single color.

File Format Speed vs Versatility part 2

how to be photographer, how to be good photographer, photographer technique, good photographer, nice photo


A very interesting feature of the JPEG 2000 format is that it supports using a Region of Interest (ROI) to minimize file size and preserve quality in critical areas of an image. By using an alpha channel, you can specify the region (ROI) where the most detail should be preserved, minimizing the compression (and loss of detail) in that area.

GIF (Graphics Interchange Format) is a file format commonly used to display indexed-color graphics and images in hypertext markup language (HTML) documents over the Internet. GIF is an LZW-compressed format designed to minimize file size and electronic transfer time. The GIF format preserves transparency in indexed-color images; however, it does not support alpha channels.

TIFF (Tagged Image File Format) files are lossless, meaning that they do not degrade in image quality when repeatedly opened and closed. This is a very flexible image format supported by virtually all painting, imageediting, and page-layout applications. Also, virtually all desktop scanners can produce TIFF files. Photoshop can save layers in a TIFF file; however, if you open the file in another application, only the flattened image is visible. Photoshop can also save annotations, transparency, and multi-resolution pyramid data in TIFF format.

PSD (Photoshop Document) is Photoshop’s native file format and the only format that supports most Photoshop features (other than the Large Document Format [PSB]). Due to the tight integration between Adobe products, other Adobe applications can directly import PSD files and preserve many Photoshop features. Saving a PSD file is worthwhile if complicated manipulations were performed in Photoshop; in the File Info section of a PSD file, all of the procedures will be documented in chronological order.

File Format Speed vs Versatility part 1

how to be photographer, how to be good photographer, photographer technique, good photographer, nice photo


RAW Files. RAW files retain the highest amount of image data from the original capture, so the files can be “fixed” to a much greater degree than JPEG files. However, if you are like most wedding photographers and need fast burst rates, RAW files will likely slow you down.RAW files will also fill up your storage cards much more quickly because of their larger file size. (Note: Because camera buffers and processing speeds have increased in size and performance, increasing numbers of professional wedding photographers are opting to shoot RAW files. If you know a situation is coming where you will need fast burst rates, you can always switch temporarily to the JPEG fine mode, and then back to RAW when the moment passes.)

Shooting in the RAWmode also requires the use of file-processing software to translate the file data into a useable format. This adds another step to your postproduction workflow, but provides valuable control over white balance, tint, exposure, brightness, contrast, saturation, luminance smoothing, color noise reduction, chromatic aberration, vignetting, tone curve (contrast control), shadow tint, and red, green, and blue saturation.

JPEG. Your other option is to shoot in the JPEG Fine mode (sometimes called JPEG Highest Quality). This creates smaller files, so you can save more images per media card and work much more quickly. Because of this increased speed and flexibility, many pros shoot in the JPEG Fine mode. Because there is less data preserved in this format, however, your exposure and white balance must be flawless. In short, the JPEG format is efficient, but it will reveal any weakness in your technique. (Note: Because the JPEG format compresses file information, the files are subject to degradation by repeated saving. If you shoot in JPEG mode, save your working copy of the file in the TIFF format [see page 42].)

Other Useful Formats. The JPEG 2000 format (supported by an option plug-in in Photoshop) provides more options and greater flexibility than the standard JPEG format. It offers optional lossless compression as well as 16-bit color/grayscale files, 8-bit transparency, and both alpha and spot channels can be saved.

Watch Your ISO Settings

how to be photographer, how to be good photographer, photographer technique, good photographer, nice photo


In general, the higher the ISO setting on your camera, the more noise will be recorded. This is a condition, akin to visible grain in film photography, that occurs in digital imaging when stray electronic information affects the sensor sites. Fortunately, this is less of a problem than it once was.

At this writing, the latest pro DSLRs from Nikon (D3) and Canon (EOS 1Ds Mark III) feature remarkably high ISOs and low noise. Nikon’s D3 even offers a black & white ISO setting that goes up to ISO 25,600 with remarkably low noise. Many DSLRs also feature specialized modes that automatically reduce noise in long-exposure situations. These settings are quite effective, regardless of ISO.

There are also a number of effective noise-reducing applications available for postproduction. Adobe Camera Raw features two types of noise reduction (one for color noise [chrominance] and one for black & white noise [luminance]) that can be applied in RAW file processing. Nik Software’s dFine 2.0 is another very sophisticated noise-reduction program that lets you reduce noise globally or selectively, targeting critical parts of the image.

The White Balance Saves Time

how to be photographer, how to be good photographer, photographer technique, good photographer, nice photo


Choosing the right white-balance setting is particularly important if you are shooting JPEG files; it is less important when shooting in the RAW file mode, since these files contain more data than JPEGs and allow color imbalances to be easily remedied in postproduction.While this would seem to argue for shooting exclusively RAW files, it’s important to note that these files take up more room on media cards and require more time to write to the cards. As a result, many wedding photographers find it more practical to shoot JPEGs and perfect the color balance when creating the exposure.

A system that many pros follow is to take a custom white balance of a scene where they are unsure of the lighting mix. By selecting a white area in the scene and neutralizing it with a custom white-balance setting, you can be assured of an accurate color rendition. Others swear by a device known as the ExpoDisc (www.expodisc.com), which attaches to the the lens like a filter and is highly accurate in most situations.

Select the Optimal Color Space

how to be photographer, how to be good photographer, photographer technique, good photographer, nice photo


Many DSLRs allow you to shoot in the Adobe RGB 1998 or sRGB color space. There is considerable confusion over which is the “right” choice. Adobe RGB 1998 is a wider gamut color space than sRGB, so many photographers reason that this is the best option. Professional digital-imaging labs, however, use sRGB for their digital printers.
Therefore, photographers working in Adobe 1998 RGB may be somewhat disheartened when their files are reconfigured and output in the narrower sRGB color space. As a result, many photographers use the Adobe 1998 RGB color space right up to the point that files are sent to a printer or out to the lab for printing.

Is there ever a need for other color spaces? Yes. It depends on your particular workflow. For example, all the images you see in this book have been converted from their native sRGB or Adobe 1998 RGB color space to the CMYK color space for photomechanical printing. As a general preference, I prefer images from photographers be in the Adobe 1998 RGB color space, as they seem to convert more naturally to CMYK.

In Adobe Camera Raw and other RAW-file processing software there exists another color space, which has become quite popular, called ProPhoto RGB. It is a “sticky” color space, meaning that it adds color data to the file. The added data cannot be seen on monitors currently sold, but what can be seen is the increased resolution and size of the image file.

A typical RAW file made with a Nikon D200, which uses a 10.2MP sensor, produces a file in the neighborhood of 22 or 23MB. A good size file, to be sure—but when ProPhoto RGB is used to process the image in the RAW file processor, the file opens at 72MB, a very healthy increase in file size and potential resolution. Many photographers who shoot RAW, and also make large prints, process the images in this color space to take advantage of the added color data and larger file sizes.

Choose the Right Aperture

how to be photographer, how to be good photographer, photographer technique, good photographer, nice photo


The closer you are to your subjects, with any lens, the less depth of field you will have at any given aperture. When you are shooting a tight image of faces, be sure that you have enough depth of field at your working lens aperture to hold the focus on all the faces. At wide lens apertures, you will need to focus very carefully to keep the eyes, lips, and tip of the nose critically sharp.

This is where a good working knowledge of your lenses is essential. Some lenses will have the majority (two thirds) of their depth of field behind the point of focus; others will have the majority (two thirds) of their depth of field in front of the point of focus. In most cases, depth of field is split 50–50, half in front of and half behind the point of focus.

You should also learn to use the magnification function on your LCD back to inspect the depth-of-field of your images. The viewfinder screen is often too dim to gauge overall image sharpness accurately when the lens is stopped down with the depth-of-field preview. Double-checking the focus on your LCD will help ensure you got the sharpness you wanted.

Choose the Right Shutter Speed

how to be photographer, how to be good photographer, photographer technique, good photographer, nice photo


You must choose a shutter speed that stills both camera and subject movement. If using a tripod, a shutter speed of 1/15 to 1/60 second should be adequate to stop average subject movement. Outdoors, you should normally choose a shutter speed faster than 1/60 second, because even a slight breeze will cause the subject’s hair to flutter, producing motion during the moment of exposure. If you are using electronic flash, you are locked into the flash-sync speed your camera calls for unless you are dragging the shutter (working at a slower-than-flash-sync shutter speed to bring up the level of the ambient light).

When handholding the camera, you should select a shutter speed that is the reciprocal of the focal length of the lens you are using (or faster). For example, if using a 100mm lens, use 1/100 second (or the next highest equivalent shutter speed, like 1/125) under average conditions. Some photographers are able to handhold their cameras for impossibly long exposures, like 1/4 or 1/2 second. To do this, you must practice good breathing and shooting techniques.With the handheld camera laid flat in the palm of your hand and your elbows in against your body, take a deep breath and hold it. Do not exhale until you’ve squeezed the shutter. Spread your feet like a tripod and if you are near a doorway, lean against it for additional support.

If you are shooting handheld and working very close to the subjects, as you might be when making a portrait of a couple, you will need to use a faster shutter speed because of the increased image magnification. When working farther away from the subject, you can revert to the shutter speed that is the reciprocal of your lens’s focal length. When shooting subjects in motion, use a faster shutter speed and a wider lens aperture. In this kind of shot, it’s more important to freeze subject movement than it is to have great depth of field. Ultimately, if you have any question as to which speed to use, use the next fastest speed to ensure sharpness.

A great technical improvement is the development of image stabilization lenses, which correct for camera movement and allow you to shoot handheld with long lenses and slower shutter speeds. Canon and Nikon, two companies that currently offer this feature in some of their lenses, offer a wide variety of zooms and long focal length lenses with image stabilization. If using a zoom, for instance, which has a maximum aperture of f/4, you can shoot handheld wide open in subdued light at 1/10 or 1/15 second and get dramatically sharp results. This means that you can use the natural light longer into the day while still shooting at low ISO settings for fine grain.
It is important to note, however, that subject movement will not be quelled with these lenses, only camera movement.

Get the Exposure Right

how to be photographer, how to be good photographer, photographer technique, good photographer, nice photo


Accuracy is Critical. The wedding day presents the ultimate in exposure extremes (a black tuxedo and a white wedding dress), and when shooting digitally (especially JPEGs) the exposure latitude is virtually nonexistent. Underexposed digital files tend to have an excessive amount of noise; overexposed files lack image detail in the highlights. You must be right on with your exposures when shooting JPEGs. If you make an error, though, let it be in the direction of slight underexposure, which is survivable. Overexposure of any kind is a deal breaker. You must also guarantee that the dynamic range of the processed image fits that of the materials you will use to exhibit the image (i.e., the printing paper, ink, or photographic paper).

Meters. The preferred meter for portraits is the handheld incident light meter. This measures the amount of light falling on the scene (rather than the reflectance of the subjects) and yields extremely consistent results, because it is less likely to be influenced by highly reflective or light-absorbing surfaces. To use this meter, simply stand where you want your subjects to be, point the dome of the meter directly at the camera lens and take a reading. If you can’t physically get to your subject’s position, meter the light at your location (if it is the same as the lighting at the subject position). A handheld incident flashmeter is also invaluable when using multiple strobes and when trying to determine the overall evenness of lighting in a
large room.

Meter Calibration. Like all mechanical instruments, meters can get out of whack and need periodic adjustment to ensure accuracy. Therefore, it is advisable to run periodic checks on your handheld and in-camera meters; after all, you base the majority of your exposures on their data. If your incident meter is also a flashmeter, you should check it against a second meter to verify its accuracy.

Quick Exposure Evaluation. There are two ways to quickly evaluate the exposure of the captured image. First, the LCD monitor provides a quick visual reference for making sure things are okay in terms of the sharpness and exposure. For more accurate feedback, however, you should review the histogram. This is a graphic representation of the number of pixels at each brightness level. The range of the histogram represents 0–255 from left to right, with 0 indicating “absolute” black and 255 indicating “absolute” white. In an image with a good range of tones, the histogram will fill the length of the graph and (in most cases) trail off on either end. When an exposure has detailed highlights, these will fall in the 235–245 range; when an image has detailed blacks, these will fall in the 15–30 range (RGB mode).

Make Calculated Lens Choices part 2

how to be photographer, how to be good photographer, photographer technique, good photographer, nice photo


Another popular choice is the 85mm (f/1.2 for Canon; f/1.4 or f/1.8 for Nikon), which is a short telephoto with exceptional sharpness. This lens gets used frequently at receptions because of its speed and ability to throw backgrounds out of focus, depending on the subject-to-camera distance. It is one of Marcus Bell’s preferred lenses for his wedding-day coverage.

The Normal Lens. One should not, however, forget about the “normal” 50mm f/1.2 or f/1.4 lens for digital photography. With a 1.4x focal length factor, for example, that lens becomes a 70mm f/1.2 or f/1.4 lens that is ideal for portraits or groups, especially in low light. And the close focusing distance of this lens makes it an extremely versatile wedding lens.

Perspective and Distortion. When selecting a lens, the perspective it provides should always be considered. Wide-angle lenses will distort the subject’s appearance, particularly if they are close to the camera or near the edge of the frame. In group portraits, the subjects in the front row will appear larger than those in the back of the group, especially if you get too close. Even “normal” lenses (50mm in 35mm format, 75–90mm in the medium formats) tend to exaggerate subject features at closer working distances. Noses appear elongated, chins jut out, and the backs of heads may
appear smaller than normal. This phenomenon is known as foreshortening. At longer working distances (such as when creating three-quarter-length portraits or group portraits), however, normal lenses are a good choice and will provide normal perspective.

For close shots of individual subjects and couples, short to medium telephotos are a good choice. You can even use a much longer lens if you have the working room. A 200mm lens, for instance, is a beautiful portrait lens for the 35mm format because it provides very shallow depth of field and throws the background completely out of focus (when used at maximum aperture), providing a backdrop that won’t distract viewers from the subject.

Keep in mind, though, that very long lenses (300mm and longer for 35mm) can sometimes distort perspective unless used at awkwardly long camera-to-subject distances. If the working distance is too short, the subject’s features appear compressed; the nose may appear pasted onto the subject’s face, and the ears may appear parallel to the eyes. These very long lenses are, however, ideal for working unobserved—you can make head and shoulders images from a long distance away.

Make Calculated Lens Choices part 1

how to be photographer, how to be good photographer, photographer technique, good photographer, nice photo


Prime or Zoom? Another concern is whether to use prime (fixed focallength) lenses or zoom lenses. Faster prime lenses will get lots of use, as they afford many more “available light” opportunities than slower speed lenses. Although modern zoom lenses, particularly those designed for digital SLRs, are extremely sharp, many photographers insist that a multi purpose lens cannot possibly be as sharp as a prime lens, which is optimized for use at a single focal length.

Mike Colón, a talented photographer from the San Diego area, uses prime lenses (not zooms) in his wedding coverage and shoots at wide-open apertures most of the time to minimize background distractions. He says, “The telephoto lens is my first choice, because it allows me to be far enough away to avoid drawing attention to myself but close enough to clearly capture the moment. Wide-angle lenses, however, are great for shooting from the hip. I can grab unexpected moments all around me without even looking through the lens.”

Zoom lenses are also extremely popular however, and offer unbeatable versatility, allowing you to move quickly from wide to tight views. A common choice seems to be the 80–200mm f/2.8 (Nikon) or the 70–200mm f/2.8 (Canon and Nikon). These are very fast, lightweight lenses that offer a wide variety of useful focal lengths for both the ceremony and reception. They are internal focusing, meaning that the autofocus is lightning fast and the lens does not change length as it is zoomed or focused. At the shortest range, either of these lenses is perfect for creating full- and three-quarter length portraits. At the long end, the 200mm setting is ideal for tightly cropped, candid shots or head-and-shoulders portraits. These zoom lenses also feature fixed maximum apertures, which do not change as the lens is zoomed. This is a prerequisite for any lens to be used in fast-changing conditions. Lenses with variable maximum apertures provide a cost savings but are not as functional nor as bright in the viewfinder as the faster, fixed aperture lenses.

Wide Angles. Wide-angle lenses, both fixed focal length lenses and wide-angle zooms, are also popular. Focal lengths from 17mm to 35mm are ideal for capturing the atmosphere as well as for photographing larger groups. These lenses are fast enough for use by available light with fast ISO.

Telephotos. Another favorite lens is the high-speed telephoto—the 400mm f/2.8 or 300mm f/4.0 (Nikon) and the 300mm and 400mm f/2.8L (Canon) lenses. These lenses are ideal for working unobserved and can isolate some wonderful moments, particularly of the ceremony. Even more than the 80–200mm lens, the 300mm or 400mm lenses throw backgrounds beautifully out of focus and, when used wide open, provide a sumptuously thin band of focus, which is ideal for isolating image details.

Choose the Right Shutter Speed

how to be photographer, how to be good photographer, photographer technique, good photographer, nice photo


You must choose a shutter speed that stills both camera and subject movement. If using a tripod, a shutter speed of 1/15 to 1/60 second should be adequate to stop average subject movement. Outdoors, you should normally choose a shutter speed faster than 1/60 second, because even a slight breeze will cause the subject’s hair to flutter, producing motion during the moment of exposure. If you are using electronic flash, you are locked into the flash-sync speed your camera calls for unless you are dragging the shutter (working at a slower-than-flash-sync shutter speed to bring up the level of the ambient light).

When handholding the camera, you should select a shutter speed that is the reciprocal of the focal length of the lens you are using (or faster). For example, if using a 100mm lens, use 1/100 second (or the next highest equivalent shutter speed, like 1/125) under average conditions. Some photographers are able to handhold their cameras for impossibly long exposures, like 1/4 or 1/2 second. To do this, you must practice good breathing and shooting techniques.With the handheld camera laid flat in the palm of your hand and your elbows in against your body, take a deep breath and hold it. Do not exhale until you’ve squeezed the shutter. Spread your feet like a tripod and if you are near a doorway, lean against it for additional support.

If you are shooting handheld and working very close to the subjects, as you might be when making a portrait of a couple, you will need to use a faster shutter speed because of the increased image magnification. When working farther away from the subject, you can revert to the shutter speed that is the reciprocal of your lens’s focal length. When shooting subjects in motion, use a faster shutter speed and a wider lens aperture. In this kind of shot, it’s more important to freeze subject movement than it is to have great depth of field. Ultimately, if you have any question as to which speed to use, use the next fastest speed to ensure sharpness.

A great technical improvement is the development of image stabilization lenses, which correct for camera movement and allow you to shoot handheld with long lenses and slower shutter speeds. Canon and Nikon, two companies that currently offer this feature in some of their lenses, offer a wide variety of zooms and long focal length lenses with image stabilization. If using a zoom, for instance, which has a maximum aperture of f/4, you can shoot handheld wide open in subdued light at 1/10 or 1/15 second and get dramatically sharp results. This means that you can use the natural light longer into the day while still shooting at low ISO settings for fine grain.
It is important to note, however, that subject movement will not be quelled with these lenses, only camera movement.

Have Backup and Emergency Equipment

how to be photographer, how to be good photographer, photographer technique, good photographer, nice photo


Wedding photographers live by Murphy’s Law: if anything can go wrong, it will go wrong. That is why most seasoned pros carry backups—extra camera bodies, flash heads, transmitters, batteries, cords, twice the required amount of film or storage cards, etc. For AC-powered flash, extra extension cords, several rolls of duct tape (for taping cords to the floor), power strips, flash tubes, and modeling lights also need to be on hand.

Other items of note include a stepladder for making groups shots, flashlights, a mini tool kit (for mini emergencies), and quick-release plates for your tripods (these always seem to get left behind on a table or left attached to a camera). Spare batteries are also a must. Today’s camera batteries are much better than in years past and should last all day without replacement. However, it’s always a good idea to bring extra batteries and a charger or two.

Spare packs should be fully charged and ready to go—and you should have enough to handle your cameras as well as your assistant’s cameras and the backup gear. If downloading images to a laptop, do not forget spare laptop batteries or the computer’s AC adapter.

Pack Three Camera Bags

how to be photographer, how to be good photographer, photographer technique, good photographer, nice photo


As the saying goes, “Luck favors the prepared.” That’s Marcus Bell’s approach to packing his gear for a wedding. He uses three small bags. Here’s what he places in each:

Main Bag
• Spare batteries
• Breath freshener (“A courtesy,” he says.)
• Air brush and lens-cleaning cloth
• Two Canon EOS 5Ds
• Two main lenses: 28–70mm f/2.8 and 85mm f/1.2
• 70–200mm f/2.8 lens for ceremony
• Epson P4000 downloader (carried in pocket)
• Point-and-shoot 8MP camera for backup (surprisingly, some of the album images get made with this camera)
• Digital flashmeter
• Flashlight for looking through the three bags
• Stain Stick and spare cloth (to get any stain out of the wedding dress)

Waist Bag (Worn All Day)
• Secondary lenses (35mm f/1.4 and 17–35mm f/2.8)
• Crochet hook (sometimes need to help fasten the bride’s dress)
• Arctic Butterfly (a battery-powered sensor-cleaning brush)
• Small handheld video light (battery powered)
• Extension tube for closeups
• More spare batteries
• 30GB worth of CF cards, 4GB capacity each

Backup Bag
• EOS 1D Mark II
• 85mm f/1.8 and 50mm f/1.4 lenses
• Tele-extender (rarely used, but kept in the backup bag nonetheless)
• More spare batteries
• Charger for batteries
• Timetable sheet for events and instructions on how to get there

Work Unobtrusively

how to be photographer, how to be good photographer, photographer technique, good photographer, nice photo


Traditional wedding coverage would feature dozens of posed pictures pulled from a shot list that was often passed down by generations of other traditional wedding photographers. There may have been as many as seventy five scripted shots from cutting the cake, to tossing the garter, to the father of the bride walking his daughter down the aisle. In addition to the scripted moments, traditional photographers filled in the album with “candids,” many of which were staged (or at least made with the subjects aware of the camera).

The contemporary wedding photographer’s approach is quite different. Instead of being a part of every event, moving people around and staging the action, the photographer tends to be quietly invisible, fading into the background so the subjects are not aware of the photographer’s presence. Rather than intruding on the scene, the photographer documents it from a distance—usually with longer lenses and natural light. When people are not aware they are being photographed, they are more likely to act like themselves.Moving quietly through the event, you should be listening and watching, sensitive to what is happening and ready to react.

Of course, flying under the radar doesn’t have to mean remaining totally aloof. Describing his brand of wedding photojournalism, Greg Gibson says, “I’m not a true fly on the wall. I interact with the client. There are two camps of photojournalists. There are the ones who want to be totally invisible, the one who won’t talk or interact. I’m definitely in the other camp. I laugh and joke with the client, get them to relax with my presence. We’re going to spend a lot of time together and I don’t want them to feel like there’s a stranger in the room. If I find myself constantly in conversations with the bride and family members, then I withdraw a bit. I don’t want to be talking and not taking photos.”

Shoot Peak Action

how to be photographer, how to be good photographer, photographer technique, good photographer, nice photo


Sports photographers learn to react to an event by anticipating where and when the exposure must be made. A pole-vaulter, for example, is ascending at one moment and falling the next—and right in between there is an instant of peak action that the photographer strives to isolate. Even with high burst rates, however, it is not a question of blanketing a scene with high-speed exposures; it is knowing when to press the shutter release. With a good sense of timing and solid observation skills, you will drastically increase your chances for successful exposures in wedding situations. By being prepared for each event, being ever alert, and refining your reaction time you can also improve your odds.

Be Prepared. Being prepared to capture each moment starts with doing your homework. The more you know about the scheduled events and their order, the better you can prepare to cover those events as effectively as possible. Discussing the wedding plans with the other vendors involved (the wedding planner, DJ, caterer, officiant, etc.) and visiting each venue is an excellent way to prepare (see page 86). What you learn is critical to developing your game plan; it will allow you to choreograph your movements so that you are in the optimum position for each phase of the wedding day.
The confidence that this kind of preparation provides is also immeasurable.

Observe and React Quickly. Within this framework of “planned” events, however, you should always be watching and monitoring each moment as it unfolds around you and this usually means watching more than one event at a time. Keep your camera constantly at the ready. You may want to leave it in one of the AE modes so there are no exposure adjustments to be made. Simply raise the camera, compose, and shoot.

With quiet observation, many wonderful moments can be captured. Being able to do this effectively is a function of completely trusting yourself to translate input into instant reaction. Master wedding photojournalist Joe Buissink says, “Trust your intuition. Do not think. Just react or it will be too late.”

Recognize What’s Special

how to be photographer, how to be good photographer, photographer technique, good photographer, nice photo


Greg Gibson, a two-time Pulitzer-Prize winning journalist turned wedding photographer says, “All weddings are alike on some level—there’s a couple in love, they’re going to have this big party, there’s the anticipation, the preparation, the ceremony, the party. It’s like the movie Groundhog Day. The challenge is to find the nuances in each event.” Every wedding offers new experiences and new challenges, and this is what Gibson says keeps him fresh through fifty weddings per year. “It’s fun. When I go to a wedding, people are always glad to see me, I’m welcomed in. When I was a journalist that wasn’t always the case; Monica [Lewinsky] wasn’t happy to see me when I showed up at the Mayflower Hotel.” This allows him to remain unobtrusive and not impose on moments that should remain natural and genuine, a primary means of preserving a wedding’s uniqueness.

Perhaps because of its romantic nature, photographers who are also born romantics often find it easier to capture the special relationship shared by each couple. As photographer Michael Schuhmann says, “I love to photograph people who are in love and are comfortable expressing it—if they are so in love that they can’t contain it, then it’s real.” Being a romantic is not completely necessary, of course—after all, weddings are celebrations, which means they are also about having fun. The wedding photographer gets to be part of this joy.

The uniqueness of the event will also reveal itself more fully when the day is viewed as a story. By linking the spontaneous events of the day, sensitive portrayals that highlight the emotions elicited, you can build a visual narrative that sets each wedding apart from all others. This what the modern bride wants to see in her wedding coverage.

Develop Your People Skills

how to be photographer, how to be good photographer, photographer technique, good photographer, nice photo


To be a successful wedding photographer you have to be a “people person,” someone who is capable of inspiring trust in the bride and groom. Interaction with the participants at crucial and often very stressful moments during the wedding day is inevitable, and that is when the photographer with people skills really shines.

Elite wedding photographer Joe Buissink, for example, has been labeleda “salt of the earth” personality who makes his clients instantly like and trust him. That trust leads to complete freedom to capture the event as he sees it. It also helps that Buissink sees each wedding ceremony as significant and treats the day with great respect. Buissink advises, “You must hone your communication skills to create a personal rapport with clients, so they will invite you to participate in their special moments.” And he stresses the importance of being objective and unencumbered. “Leave your personal baggage at home,” he says, “this will allow you to balance the three principle roles of observer, director, and psychologist.”

Kevin Kubota, a successful wedding and portrait photographer from the Pacific Northwest, always encourages his couples to be themselves and to wear their emotions on their sleeves—an instruction that resonates throughout the entire day. He also tries to get to know them as much as possible before the wedding and encourages his brides and grooms to share their own ideas. This establishes a feeling of mutual trust between client and photographer.

Master wedding photographer Tom Muñoz notes that a little flattery goes a long way. “When we’re photographing the bride, we treat her like she’s a princess,” Muñoz says. “Besides knowing how to pose a woman, one of the biggest things that changes her posture and expression is what you tell her. We’re not dealing with models—and as stupid as it sounds, telling a bride how beautiful she looks changes how she photographs and how she perceives being photographed. It becomes a positive experience rather than a time-consuming, annoying one. The same thing goes for the groom,” Tom states. “His chest pumps up, he arches his back; they fall right into it. It’s very cute.”
Related Posts Plugin for WordPress, Blogger...